Author: Anna

  • Sephora VIB Rouge Event

    I just got back from Sephora’s exclusive VIB Rouge event! I went to the store on 99th and Columbus because it’s closest to my apartment on the Upper West Side. I didn’t expect it to be as packed as it was because the event was at 9 – 11 am on a Sunday. However, they did provide you with food and coffee at the event, which was very considerate.

    At the VIB Rouge event, because I spent over $35 on full priced items, I got a VIB Rouge sample pack with cosmetic bag and small rouge shopping tote. The samples that came with the bag are an Algenist Complete Eye Renewal Balm, a Benefit Watts Up Highlighter, a Buxom Mascara, an Escada Born in Paradise Perfume, a Dr. Jart+ BB Dis-A-Pore Beauty Balm, a Laura Mercier Foundation Primer, a Living Proof Perfect Hair Day, and a Make Up For Ever High Definition Blush in Coral. Additionally, because I renewed my VIB Rouge subscription for 2015 I received a Formula X Nail Polish in a special Rouge color.

    I did try out the Pantone Color IQ system at the store. It’s a really cool expensive device that does absolutely nothing. I wish it worked! It’s such a cool device and I really wanted it to work! However, it registered a much darker color that my face actually is. The poor Sephora artist was going back and forth trying to make me happy to find a foundation recommended by the computer that would work. The scanner recommended Bare Minerals BareSkin Foundation in Bare Cream 05. However, that was way too dark, and so was Bare Ivory 04. Then Bare Linen 03 was too yellow. They didn’t have any of the other lighter colors in store, so I decided not to purchase any foundation, sad.

  • Benefit’s They’re Real! Push-Up Liner.

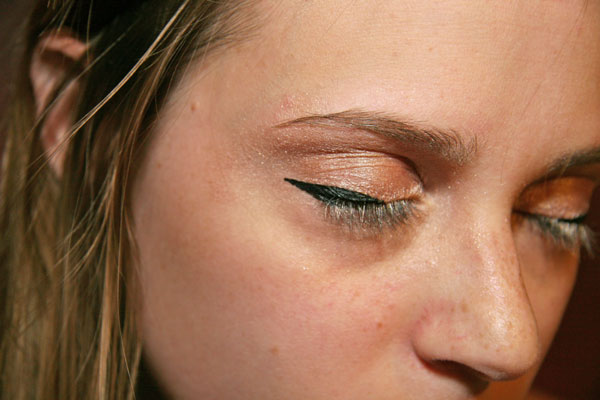
    Today I’m giving my dedicated readers a tutorial on how to use Benefit’s new They’re Real! Push-Up Liner. This liner is one of the newest additions to Benefit’s wonderful cosmetic line.

    This liner is hands-down the easiest eyeliner liner I’ve ever used! This unique liner is a creamy liner that you twist at the bottom to push more up into the applicator. The applicator tip is shaped in a way that makes it so easy to make a perfect cat eye line.

    I take the thin part of the liner to the outside part of my eyelid, and just draw a line toward my pupil. All you need is a couple of light, strategically placed, strokes and you’ve got a distinct cat eye line. If you want a thicker look, all you need to do is place the brush flatter on your eyelid, press firmer and you can create a dramatic look.

    I still use pencil eyeliner for the inside of my lid. However, I will never use another liquid eyeliner again!

  • Hair Cut & Color at Mingle Salon

    Mingle is a salon on East 55th street in New York city. Brian is my hairdresser and I have been going to see him for years now. He does the best highlights! The way Brain does highlights takes a long time, but the results are absolutely stunning. He takes small groups of hair and applies the highlighter cream individually throughout your head. This creates uneven texture that is a more natural look rather than applying highlighter evenly throughout your hair. I really love the results every time!

    Apologies for the poor quality photos. I did most of this post from my new iPhone 5S.

  • Draw the Line: Review

    Draw the Line Set from Sephora

    This set of six different eyeliners caught my eye right away, and I just had to have it. In this demonstration, I used Stila Stay All Day Waterproof Liquid Eye Liner in Black and Make Up Forever Aqua Eyes Eyeliner in Black. My two favorite liquid eyeliners were the Stila and Eyeko because of their great application tips that are kind of like calligraphy brushes. My two favorite solid eyeliners were the Silta Smudge Stick in Stingray and the Make Up Forever Eyeliner mentioned previously.

    Eyeliner Steps

    Cat Eye Tutorial:

    Step 1:

    Take the tip of your eyeliner and draw your first line from the outside edge of your eye until the most outside point of your cat eye.

    Step 2:

    Draw your second line from the center of your pupil to meet the line you just drew. Go over these lines a couple times from different angles to make sure they look straight.

    Eyeliner Fill

    Step 3:

    Fill in the cat eye outline with solid eyeliner to complete the look.

    Eyeliner Complete

    Full Complete

  • How to Make Your Hair Grow Longer

    1) Eat Healthy and Take Vitamins

    Protein, Biotin, and Folic Acid are all very important to hair growth. Eat a healthy diet and (not or) take vitamins for an added bonus.

    2) Conditioner, Conditioner, Conditioner.

    Be prepared to use a lot of conditioner. I like to use Pantene or Nexxus conditioner. Even Kyle from the Real Housewives says she uses Pantene, and her hair is long and gorgeous. Also, read the directions on the conditioner. Most say to leave it in for at least 3 minutes.

    However, you don’t need to wash your hair every time you take a shower! Only wash your hair 4 times a week if you want your hair to grow faster. Shampoos strip the moisture from the hair and if used too often can leave hair too dry and it will be prone to breakage.

    3) Trimming Your Hair is Unnecessary

    From personal experience, I have found that trimming your hair does not in fact make your hair grow longer. In general, doing anything to the ends of your hair will not affect the scalp and therefore will not affect the growth of your hair.

    However, it is important to say that if you have split ends you need to address them either by trimming your hair or using split end repair creams. Also, you should be restricting your use of hot irons and curling irons to prevent further damage.

    4) Try Scalp Massages and Hair Masques

    Massages bring blood to the surface of the skin and help relax tension in muscles. Therefore scalp massages will bring blood to the hair follicles and will increase growth.

    Masques will increase the moisture in your hair in order to prevent drying out and prevent damage.

  • Tutorial: Foundation

    1) Prep and Prime

    I will assume that you have taken a shower, but if you haven’t, please at least wash your face before applying makeup. Making sure that you have a clean and oil free surface to work with makes it easier for the makeup to apply to the skin. Afterwards, if you don’t automatically, apply a moisturizer to your face.

    Choosing a primer can be difficult because I find some to have too much silicone in them, and it tends to be harder to create an even surface. For example, the Smashbox brand or Sephora brand specifically I find harder to work with. My favorite primer is Laura Mercier’s Foundation Primer.

    2) Eyeliner & Eye shadow.

    I like to do my eyeliner and eye shadow before anything else because I know that if I mess up, I won’t have to redo my entire face. If you forget, there are two great products I like to use to protect my face from falling eye shadow. My favorite tool to use is a brush from Eyes Lips Face (e.l.f.) Cosmetics called the Studio Mascara & Shadow Shield. Another product I like to use is Shadow Shields from Beauty.com.

    3) BB or CC Cream (Optional)

    I will sometimes just use a BB Cream and powder foundation for a lighter look during my workday. However, if you want a full face, continue on to the full tutorial.

    Some of my favorite BB Cream right now is the Clinique BB Cream just because it happens to be the perfect shade for my skin. However, I’m looking forward to trying Philosophy’s new Hope in a Jar A to Z Cream.

    4) Liquid or Cream Foundation

    I personally have preferred the convenience of using a cream foundation and a compact sponge. However, using a liquid foundation and a brush or professional sponge has always been the way of professionals, before airbrushing of course. My two favorite foundations right now are NARS’s Radiant Cream Compact and Clinique’s Even Better Compact Makeup.

    5) Contouring, Blush and Highlighting

    This is when I use a bronzer and blush pallet from NARS to create definition in my face by contouring. I also use Benefit’s Watt’s Up to highlight certain areas. These will be explained in full detail in a later post.

    6) Powder Foundation

    I realize I’m no expert, but powder foundations seem all the same to me. I realize I haven’t tried them all, but most of the time its just about getting the color just right.

    7) Finishing Spray and/or Powder (Optional)

    Using a finishing spray and then a powder is my favorite way to finish off my look. I use Urban Decay All Nighter Makeup Setting Spray. This product helps save your look throughout the night. I also like to use Eyes Lips Face (E.L.F.)’s Makeup Lock & Seal. These two products together have made my makeup last throughout the night, many times.

  • Tutorial: How to look like you have bigger eyes

    I honestly have pretty huge eyes to begin with, but I like to enhance them whenever I do my makeup.

    1) Apply Eyeliner

    I like to do my eyeliner and eye shadow before anything else because I know that if I mess up, I don’t have to redo my entire face.

    In order to make your eyes look bigger, you want to do your eyeliner half way around your eye. What this means is that you start at your pupil and then go to the outside edge of your eye. The demonstration picture is below. This creates an effect that your eye is bigger than it actually is.

    2) Apply Eye Shadow

    To make your eyes look larger, you definitely don’t want to over do the eye shadow. If you darken your eye too much your eyes will actually look smaller compared to your shadow. You want to put a gentle dark color just above your eyeliner (from the pupil on just like in the picture).

    3) Apply a great mascara or fake lashes

    The best way to make your eyes look bigger is to create longer thicker lashes. I suck at fake lashes and I always get glue in my eyes. Therefore, I like using Benefit’s They’re Real! Mascara.

    4) Apply under eye concealer

    The final step is good under eye concealer for those horrible dark circles (I have the worst!). In my previous posts you will see my two favorite products that I like to mix to create the perfect coverage. My base layer is Clinique line smoothing concealer. My final touch to my eye makeup is Benefit Biiong concealer.

  • VIB Rouge Unboxing

    I am officially a VIB Rouge member at Sephora. Now I have the “view from the top” according to Sephora. Being a Rouge member gives you many benefits. I get emails about cool events, including an opportunity to meet Marc Jacobs in person, but I couldn’t go on that day. ><*  (Angry face). As a Rouge member, I also get access to the beauty studio whenever I want (unlimited services with a minimum of $125 purchase per session). Yes, I’m pretty sure that means I have to spend that much to get the service but I can do it as many times as I want, if only I had unlimited money lol. Also, I get free shipping on every order and I supposedly get a surprised gift sometimes, although I have yet to receive one.

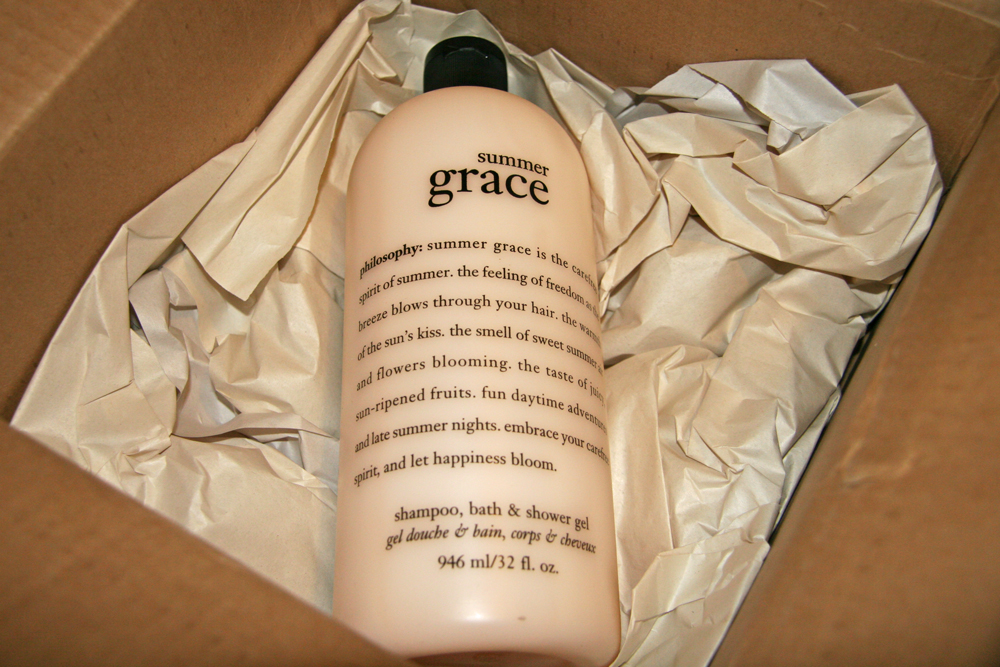
    With my VIB Rouge gift, I bought a Summer Grace body wash from Philosophy on sale for $24.

    Summer Grace

error: Content is protected !!